 Home > Articles > Add YouTube Music to CapCut
How to Add YouTube Music to CapCut
For Tiktok users, they may spend a lot of time watching a wide range of videos, and also upload their videos and it. CapCut is a popular video editing software that allows users to beautify their videos. Users always want to add music files from the best tools that have a massive library of songs, such as YouTube Music. But it's not supported in CapCut. In this guide, we will tell you how to add YouTube Music to CapCut.
Part 1: Download YouTube Music as MP3 Files
Like many other video editing software, CapCut has file format constraints and is unable to handle encrypted video or audio files. For this reason, you must convert audio to file types that CapCut supports, such as MP3, WAV, and WMA.
Method 1: Using KeepMusic YouTube Music Converter
KeepMusic YouTube Music Converter will be an excellent choice, it can help users easily download songs from YouTube Music and save them as AAC/MP3/WAV/ALAC/FLAC/AIFF and other common audio formats. You don't have to worry about the music quality after downloading, the converted songs will keep the original sound quality as well as editable ID3 tags.
What's more, with the built-in YouTube Music Web Player, you do not need to install other music applications, and it supports YouTube Music Free users and YouTube Music Premium users. 10X download speed will also save you a lot of time.
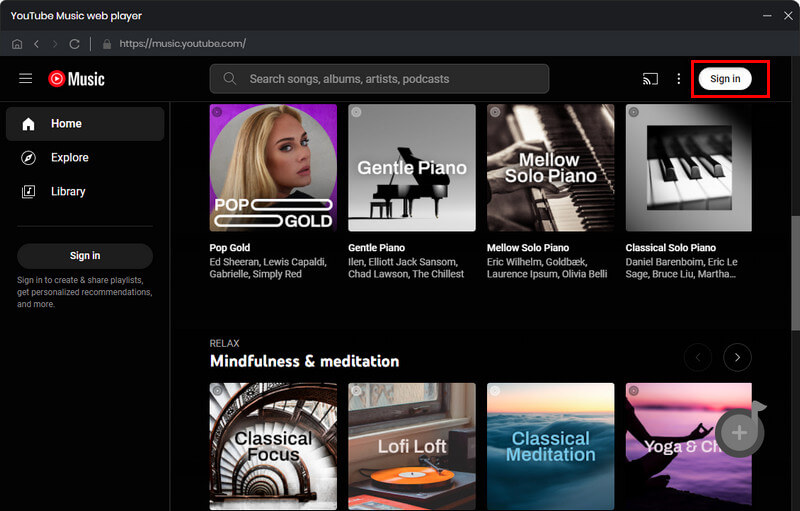
Step 1 Run KeepMusic YouTube Music Converter shortcut on your Windows PC, then follow the on-screen tips to SIGN IN to your YouTube Music Free or Premium account thus accessing the YouTube Music library.
Note: KeepMusic YouTube Music Converter won't collect your account information but it is to extract the music source from YouTube Music.
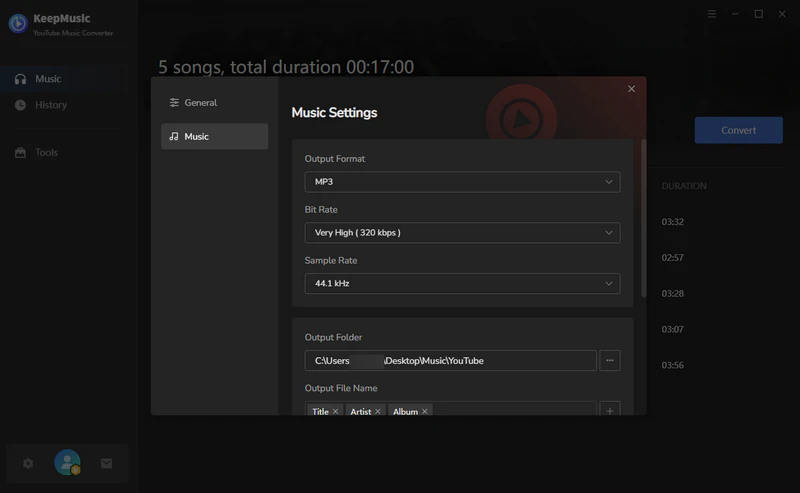
Step 2 Locate the menu area in the left side and click on
Output Format: Recommended, MP3, AAC, FLAC, WAV, AIFF, ALAC
Bit Rate: 128kbps, 192kbps, 256kbps, 320bps
Sample Rate: 44.1kHz, 48kHz, 96kHz, 192 kHz
Output Folder: C:\Users\User Name\Music\My YouTube Music (This can be modified)
Output File Name: Track Nuber/Title/Artist/Album/Playlist Index/Year Track Number
Output Organized: Playlist, Artist, Album, Artist/Album, Album/Artist, Playlist/Album, Playlist/Artist
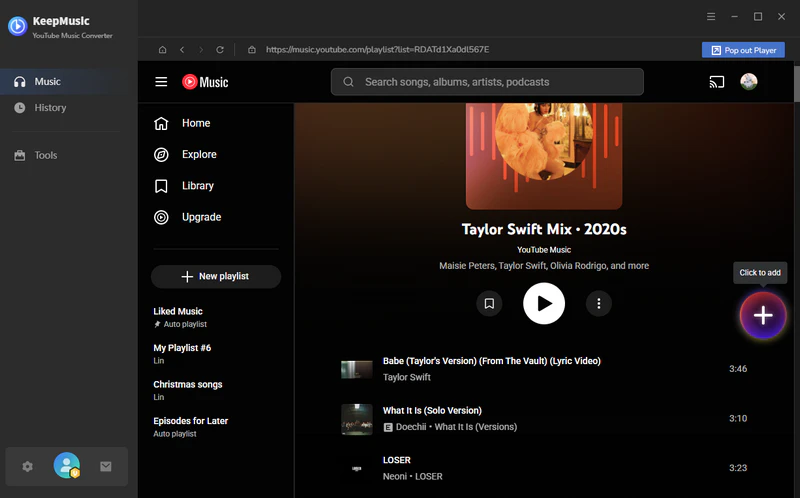
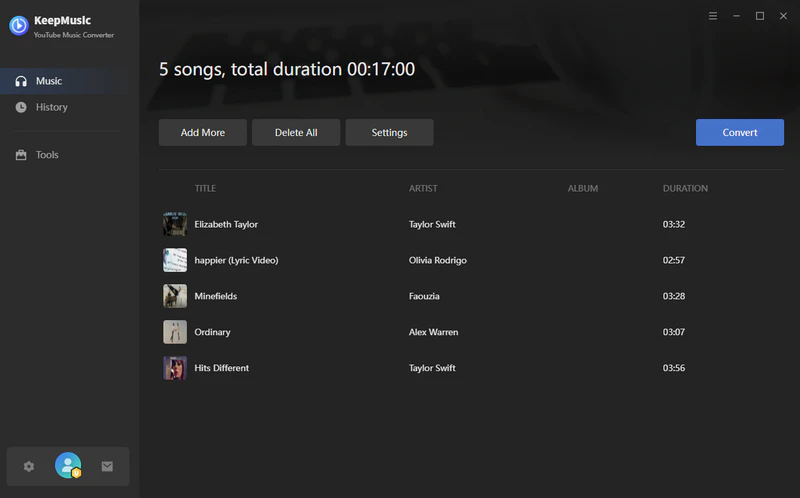
Step 3 Open a playlist, artist, album, or podcast, then click on the Add button and select the songs that you'd like to convert. The playlist will be shown on the conversion panel. You then selectively choose the songs in batches. You can also choose the whole playlist to convert.
Step 4 Click on the Convert button to start converting the YouTube songs to the output format that you set up in the previous operation.
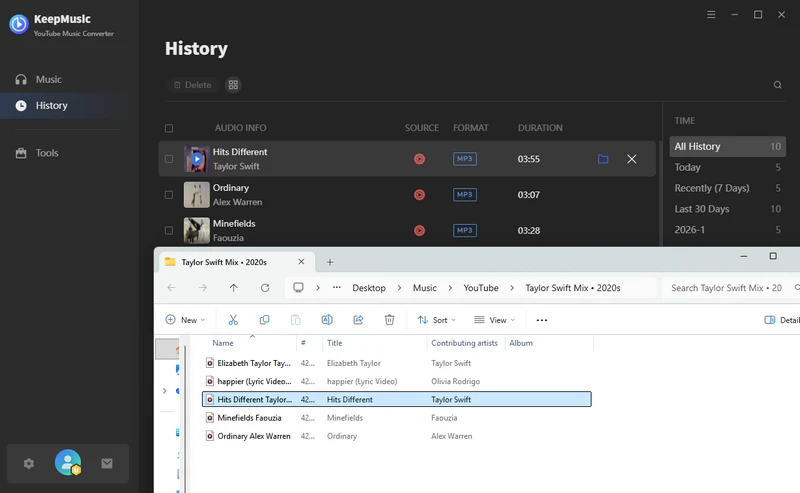
Step 5 After the conversion is completed, you can click on History to find the well-converted YouTube Music and lyrics in TXT or LRC format in the local folder of your computer. By clicking the folder icon after the converted song, you can directly reach out to the local drive that saved all the converted YouTube Music.
Method 2: Using All-In-One Music Converter
Sidify All-In-One is a comprehensive music downloader that is devoted to playlist downloads for most streaming services, including Spotify, Apple, Amazon, Tidal, YouTube, Deezer, Pandora, etc.
Notably, the features that allow users to download YouTube Music in bulk, convert YouTube Music to MP3, AAC, ALAC, AIFF, WAV, and FLAC, export YouTube Music at 320kbps, and store YouTube Music playlist downloads indefinitely without the need for a subscription.
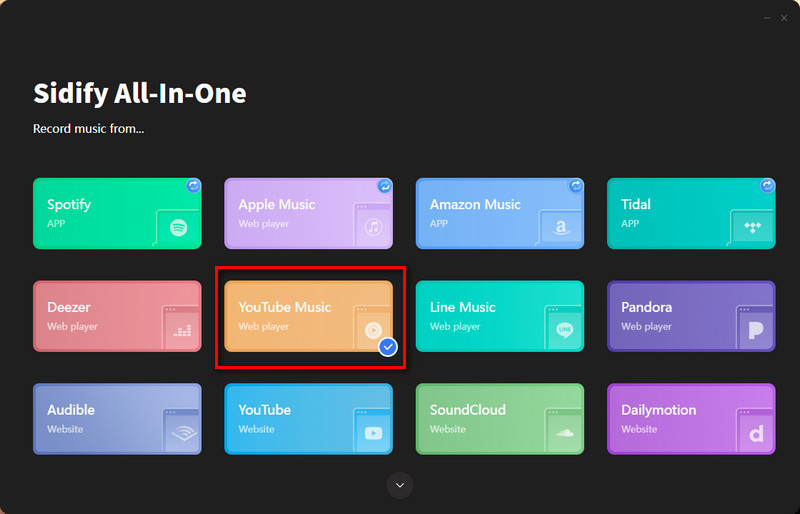
Step 1 Select Streaming Platform and Conversion Mode
Launch Sidify All-In-One on your Windows computer. As it shows up, you can choose YouTube Music that you want to download songs from. And pick the conversion mode that you are used to. App Mode vs Webplayer Mode.
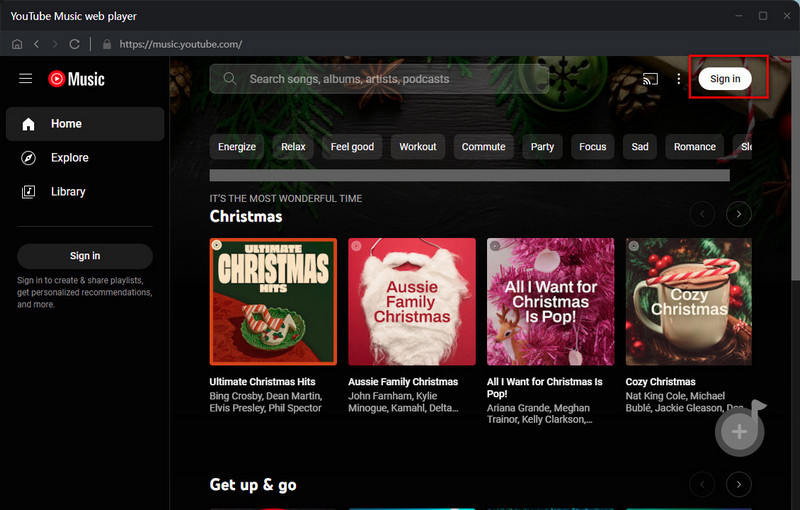
Step 2 Log in to Your Account
Log into your YouTube Music Free or Premium account when the Webplayer window appears.
Step 3 Add Music
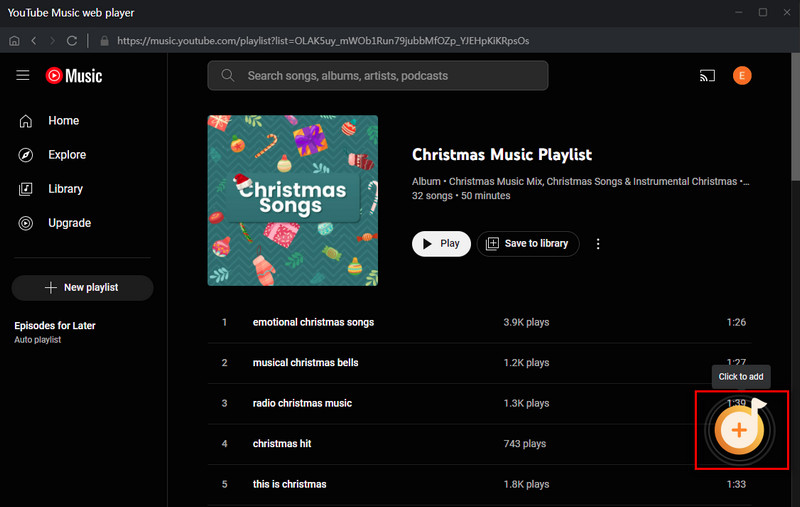
Select the music from the playlist and click the "Click to Add" button. Next, choose and select which songs from your YouTube Music playlist to download for offline listening.
Step 4 Customize Music Output Parameters
Back to the converter, navigate to the Settings menu, and choose the output format to MP3.

Step 5 Convert Music
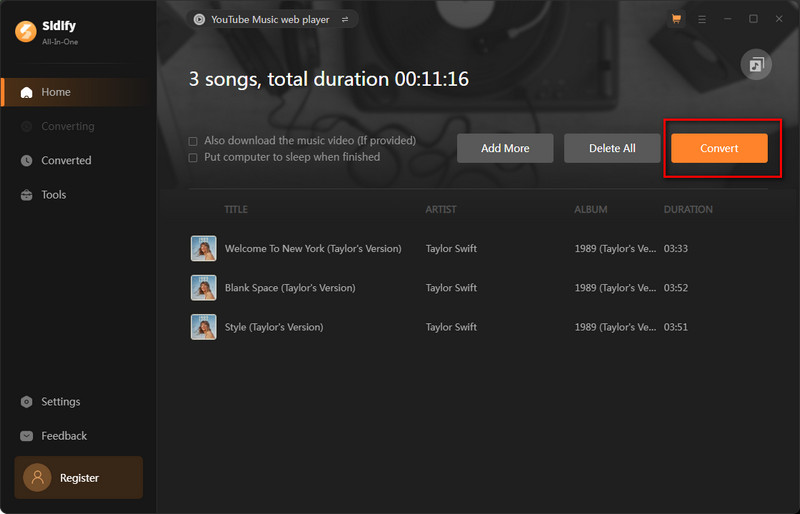
When you click the "Convert" button, the added Spotify playlists start to download together at 10x speed. All downloads are easy to find under the "Converted" part or in the output folder.
Part 2: Add YouTube Music to CapCut
Now you have already gotten the right formats of YouTube Music which are acceptable to CapCut. Importing them into CapCut and adding them to your video is easy. Here are the step-by-step instructions.
2.1 Add YouTube Music to CapCut on Windows/Mac
On Windows:
Step 1 Open the desktop version of CapCut video editor and start a new video project.
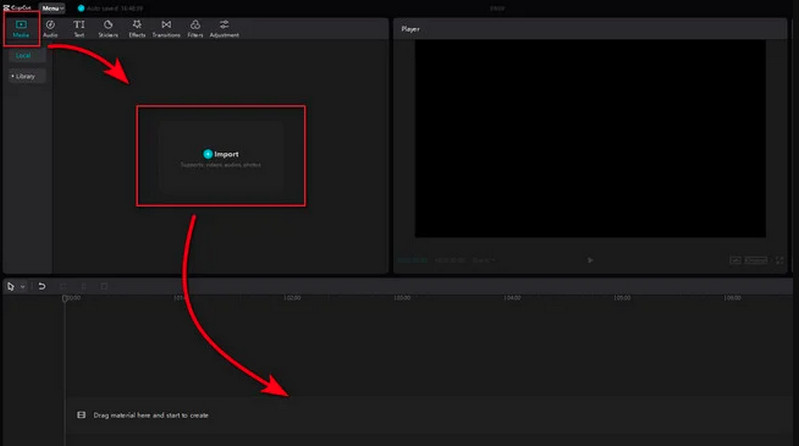
Step 2 To load an existing project, look for the "Import" button within CapCut's interface. To create a new project, look for the "Menu" > "File" > "New project" buttons.
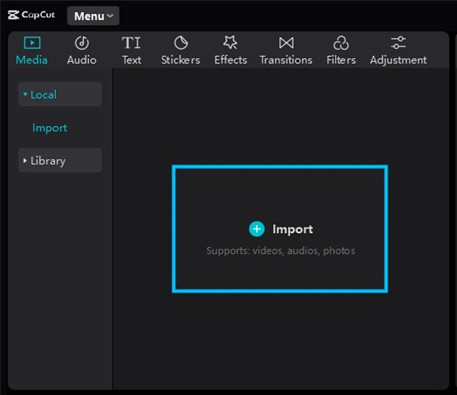
Step 3 Find the music file you downloaded on your computer and select it.
Step 4 Click "Open" to bring the music into your project's library.
Step 5 The music you imported should be located in your media library. To start the music on your project, click on it and then drag & drop it onto the timeline. Or select "Add to track."
Step 6 You can fine-tune the music by dragging its edges to change its duration, adjusting its timing, and adjusting its loudness so that it goes well with your video.
Step 7 Before you finish, play your project to make sure the music fits well with your video.
On Mac:
Step 1 Launch the desktop app, then log in with your account. Click New project to start editing a new video (or select and open an existing video project).
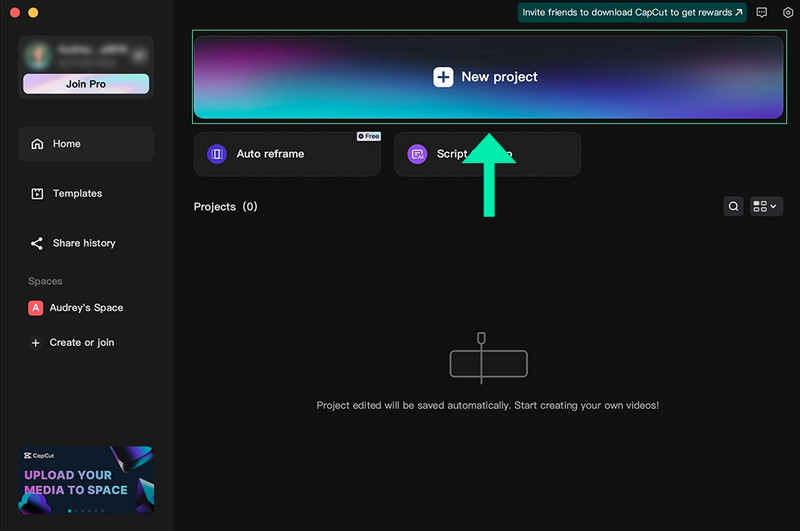
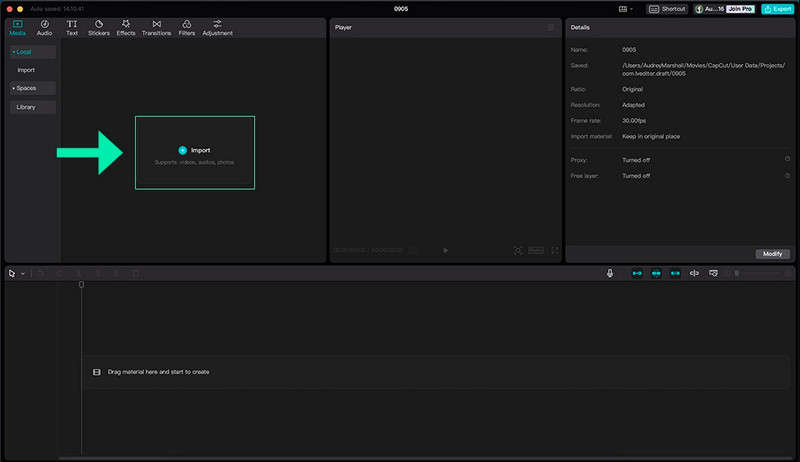
Step 2 Click Import on the project screen to select and add all of your video & audio files that are downloaded to your computer. This uploader allows you to add song files and movies to your project. Your uploaded files will be shown in your local Media files.
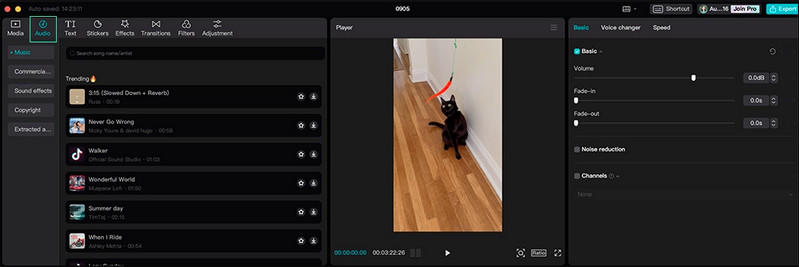
Step 3 You can choose and add music from CapCut's audio library by selecting the Audio tab.
Step 4 Simply drag your selected video & song files to your video edit timeline to edit your video to the music!

2.2 Add YouTube Music to CapCut on Mobile Devices
Step 1 Download the CapCut app to your phone or mobile device and sign in to your account.
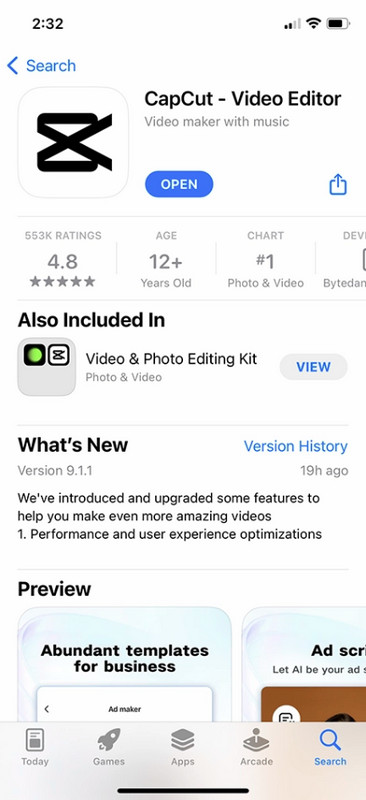
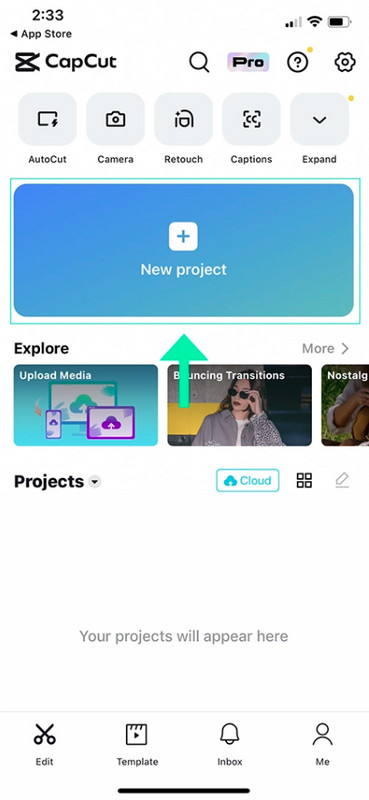
Step 2 Click on New project to start a new video editing project or select and open an existing video project.
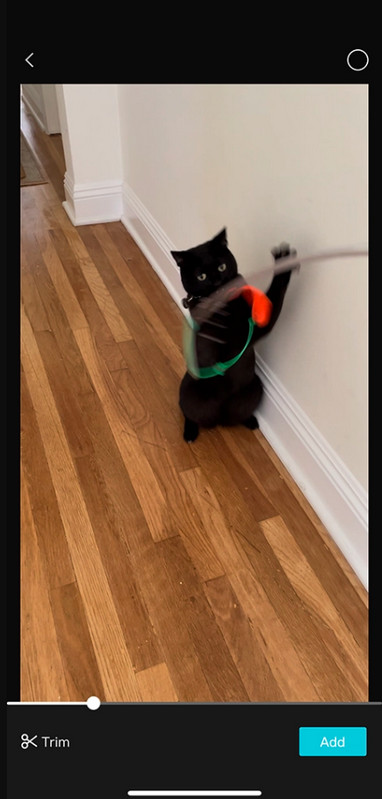
Step 3 Select and add your video files to your project from the video selection screen. You will be able to select any video files that are downloaded to your device.
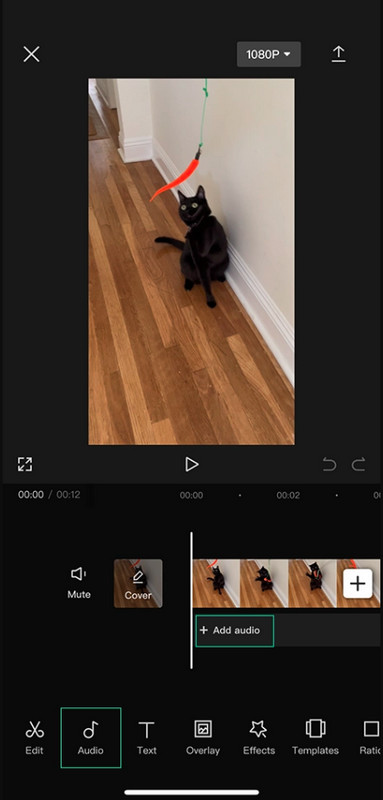
Step 4 To add music to your video, click on Add audio or the Audio tab from the bottom menu.
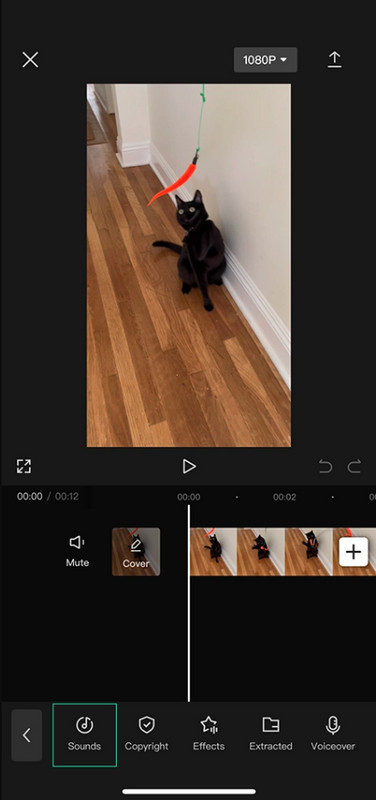
Step 5 Select the Sounds tab from the bottom menu.
Step 6 If you would like to select YouTube Music that is downloaded to your phone’s files, click the folder icon to open the Your sounds page. Otherwise, browse and select a song from the app’s audio library.
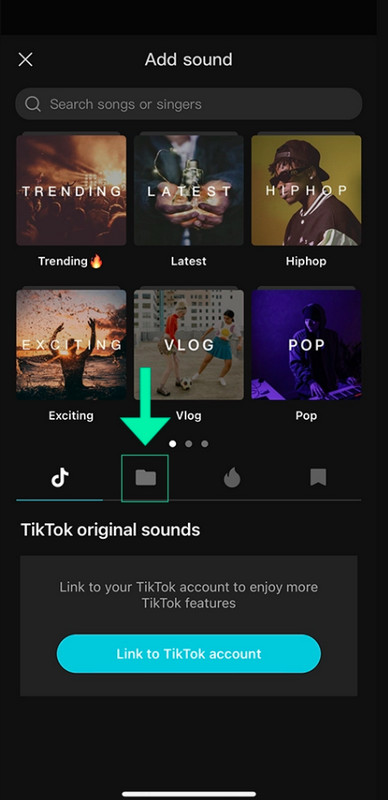
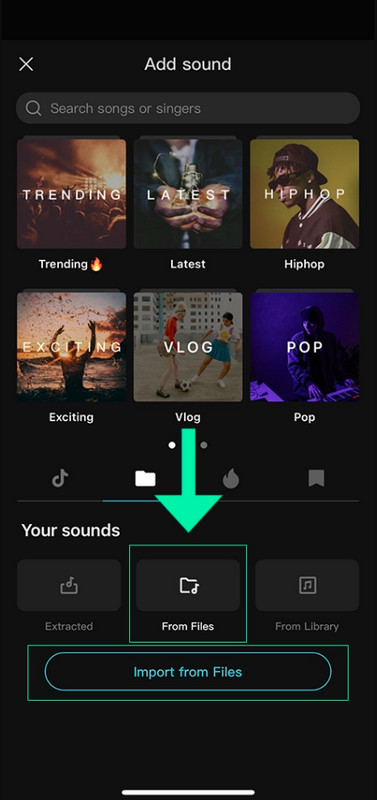
Step 7 Click From Files and then Import from Files to select a YouTube Music file or mp3 that is downloaded to your phone or iCloud drive.
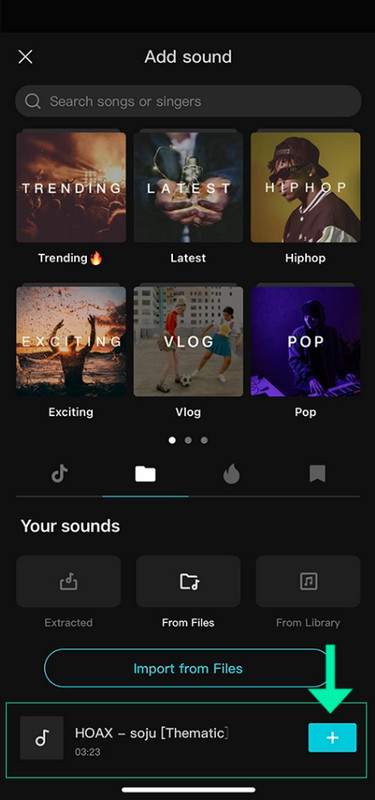
Step 8 Confirm the song you have selected by clicking the blue plus sign next to the song at the bottom of the screen.
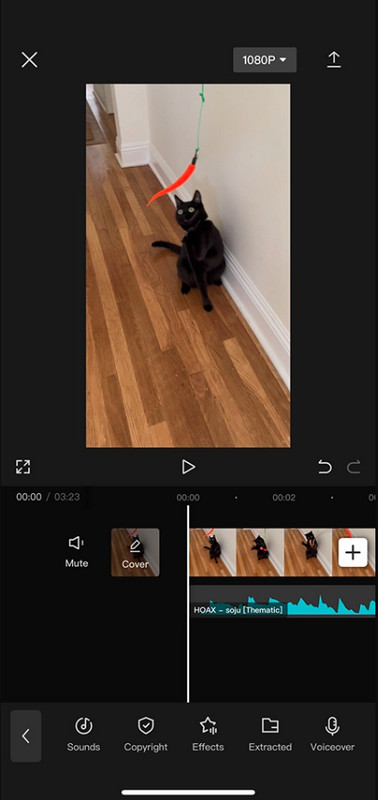
Step 9 Once your song is selected, simply edit your video to the music using CapCut’s video editor.
Part 3: FAQs
1. Why can’t I download CapCut?
CapCut isn’t currently suitable for devices running low versions of the Android OS.
2. What do I do when I see "Network error, please check your network connection/tap to try again"?
Go to Settings. Settings > CapCut > Wireless Data > Allow WLAN and Cellular Mobile Networks
3. After authorizing the network, my device automatically disables the network. How can I fix this?
Restore all settings to make things work normally again.
4. How can I use match cut for extracted audio?
At present, the beat sync feature can not be used with extracted audio.
5. How can I extract the audio from a video?
Select Audio, then Extracted. Choose the video from which you want to extract the audio, and click Import sound only.
6. How can I search for music?
Searching for music is not currently supported.
7. How can I cut an audio track?
Select the audio track. Move the white line to where you want to end the track. Tap Split in the toolbar at the bottom. Select the part of the track you don't want, and click Delete.
Summary
In this post, we introduce two software: KeepMusic YouTube Music Converter and Sidify All-In-One. With either of them, you can download YouTube Music on your device, and then upload them to CapCut. So you can edit your vidoes with YouTube Music. These two assistants put the power of music in your hands for creating instructional videos, which allows you make your videos more appealing and captivating.


