 Home > Articles > Cancel Your YouTube Music Subscription
How to Cancel Your YouTube Music Subscription
YouTube Music is a streaming service that offers a vast collection of songs, albums, playlists, and music videos from various artists across the globe. YouTube Music Subscription offers a range of awesome features, such as ad-free listening, background playback, offline access, and the ability to explore exclusive content from your beloved artists. But you need to spend $10.99 each month to enjoy all these added features.
But sometimes, your music tastes change, just like your subscription preferences. If you are looking to cancel YouTube Music Premium, here is what you need to know.
Part 1: How to Cancel YouTube Music Subscription on PC
Step 1 Log in to the YouTube Music web player.
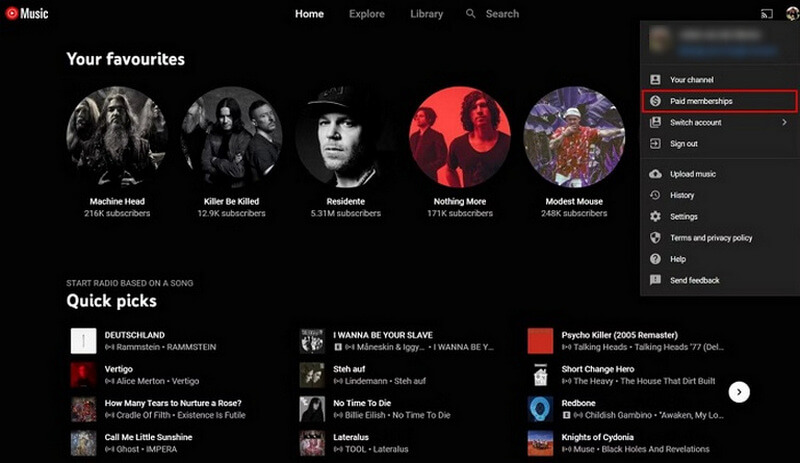
Step 2 Click your profile icon in the upper-right corner.
Step 3 In the drop-down menu, select Paid memberships to go to the paid memberships page.
Step 4 Click Manage membership next to YouTube Music Premium.
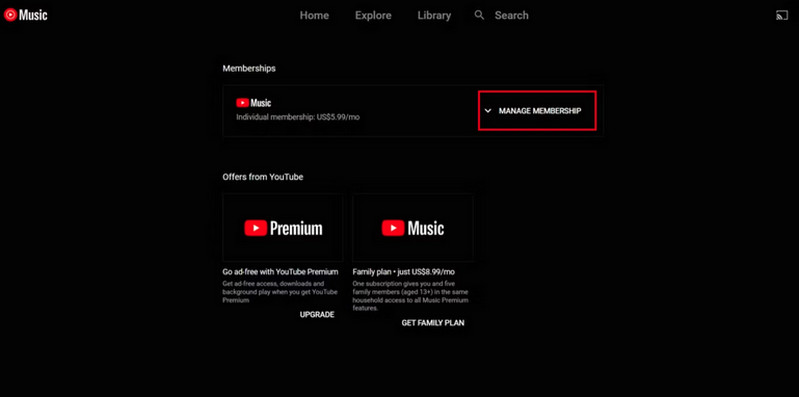
Step 5 Click the DEACTIVATE button next to your next billing date.

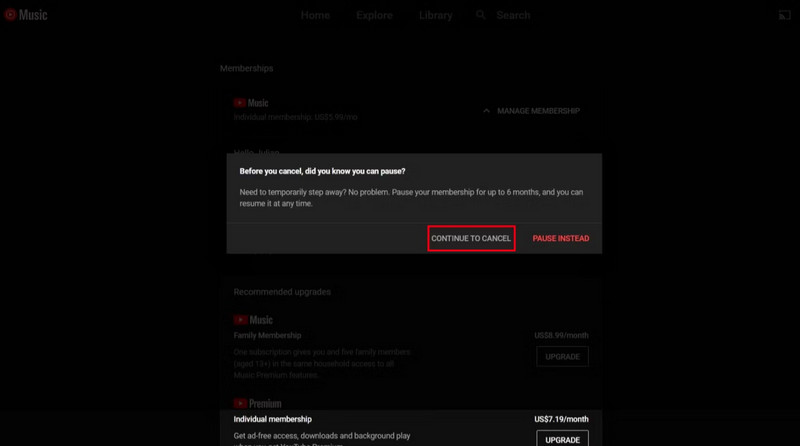
Step 6 Select the CONTINUE TO CANCEL button. You're asked if you would rather Pause membership.
Step 7 To complete the cancellation, select YES, CANCEL.
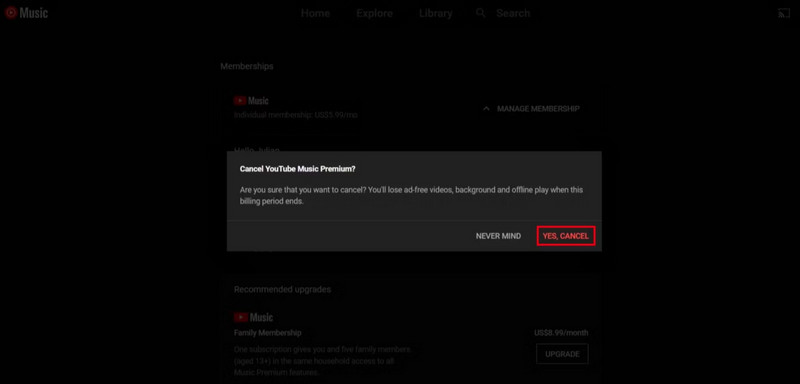
The current billing period's Premium features will still be available to you, but your YouTube Music subscription has been successfully canceled.
Part 2: How to Cancel YouTube Music Subscription on Android
Step 1 Open the YouTube application on your Android.
Step 2 Select Paid memberships by clicking on your profile in the application's upper right corner.
Step 3 You can view your current subscriptions in the YouTube app. Select the membership you want to cancel. Click the DEACTIVATE next to your next billing date.
Step 4 Tap CONTINUE TO CANCEL. Select your reason for canceling and tap NEXT. Tap YES, CANCEL
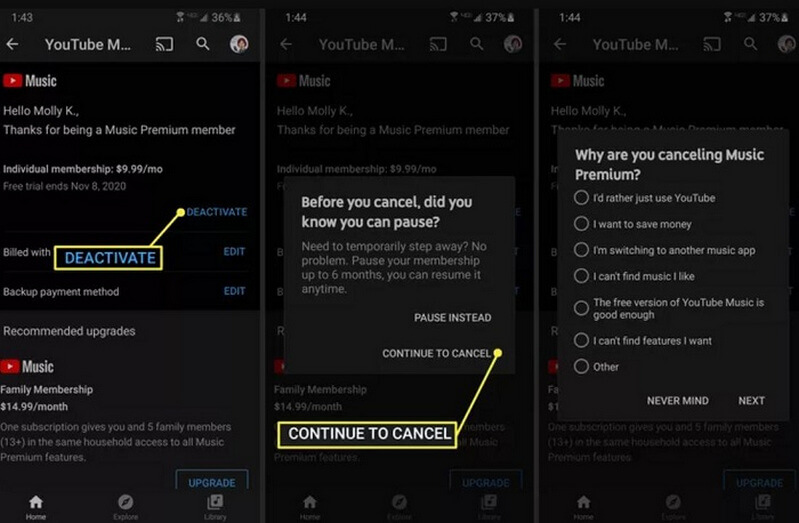
Your subscription will expire once you confirm. Your benefits will remain in effect until the end of the current billing period.
Part 3: How to Cancel YouTube Music Subscription on iPad or iPhone
If you signed up through Apple, you can immediately cancel your subscription from your Apple account.
Step 1 On your iPhone or iPad, go to Settings and tap on your Apple ID near the top.
Step 2 Select Subscriptions on the Apple ID page. Go down the page and click YouTube Music.
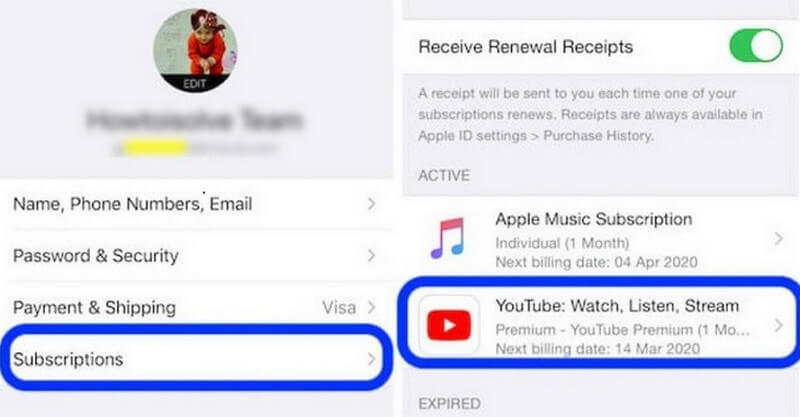
Step 3 Tap Cancel Subscription and then tap Confirm.
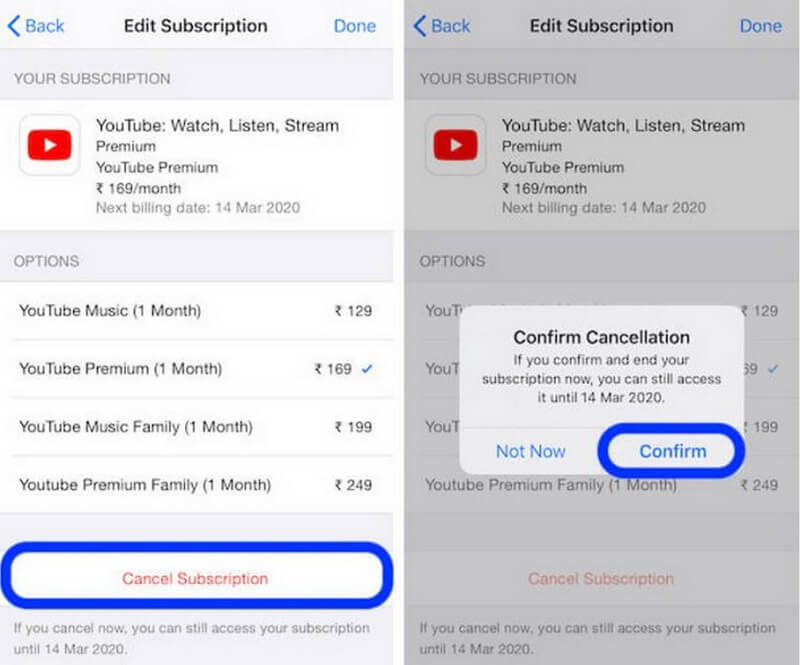
If you subscribed through YouTube itself, you can cancel your YouTube Music Premium subscription on your iPhone with the following steps.
Step 1 Open the YouTube Music app and tap your profile picture.
Step 2 Tap Paid memberships and select YouTube Music Premium.
Step 3 Tap on your membership and then tap Cancel
If you’re billed by Apple or Google Play Music, you’ll need to cancel your account through those services directly.
Part 4: How to Keep YouTube Music on Your Device After Unsubscribing
When your YouTube Music subscription expires, you eventually revert to the ad-based free version and lose access to any songs you had previously downloaded. KeepMusic YouTube Music Converter is highly advised for you if you want to keep all the downloaded content for playback.
Tool Required - KeepMusic YouTube Music Converter
KeepMusic YouTube Music Converter is a simple tool used to convert YouTube Music to MP3, AAC, WAV, FLAC, AIFF, or ALAC files, fully compatible with Windows 7, 8, 10, 11 & macOS 11 & above. This amazing program ensures the source audio quality stays intact along with treasured ID3 tags during conversion for maximum satisfaction.
 If you're looking to download music from various streaming platforms (such as Spotify, Apple Music, Tidal, Amazon Music, Audible, Deezer, YouTube, YouTube Music, SoundCloud, DailyMotion, and more) into MP3 files, All-In-One Music Converter is a perfect choice.
Download YouTube Music without YouTube Music Premium
With KeepMusic, you can download & convert a YouTube Music playlist to MP3 in 5 simple steps:
Step 1 Open KeepMusic YouTube Music Converter
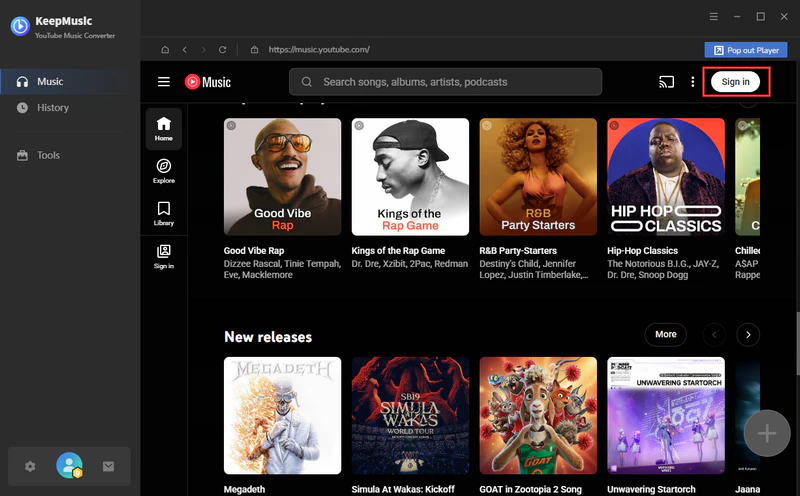
Open KeepMusic YouTube Music Converter, and click SIGN IN to log in with your YouTube Music account.
Step 2 Choose MP3 Output Format
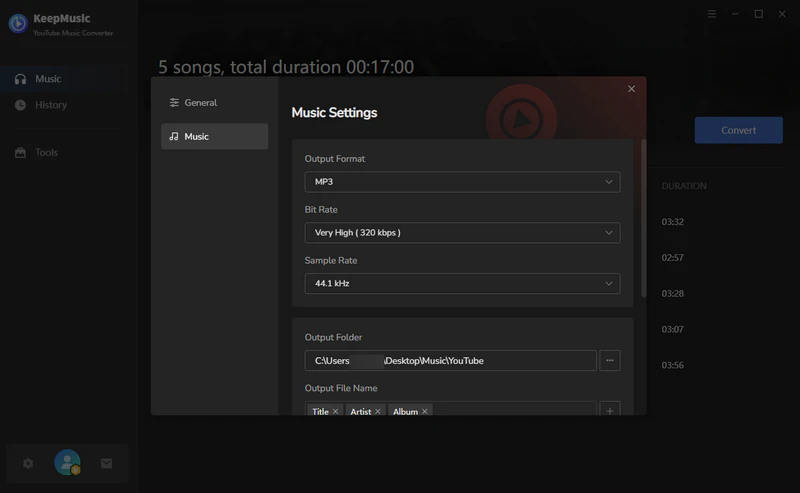
Click the Settings icon in the left side. Here you can choose the output format (MP3/AAC/WAV/FLAC/AIFF/ALAC), specify the output folder and how you’d like to name and sort out the output files, etc.
Step 3 Upload a YouTube Music Playlist to KeepMusic
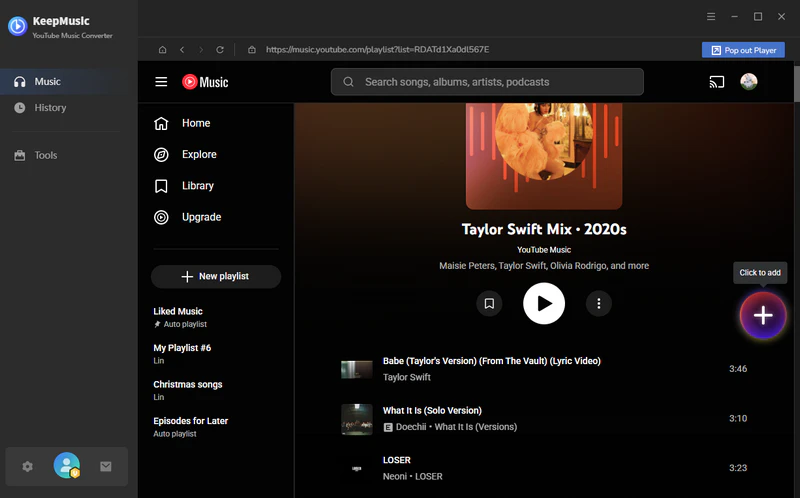
Go to a playlist, and click the floating Add button. You can then select the songs in that playlist for conversion.
Step 4 Convert the YouTube Music Playlist to MP3
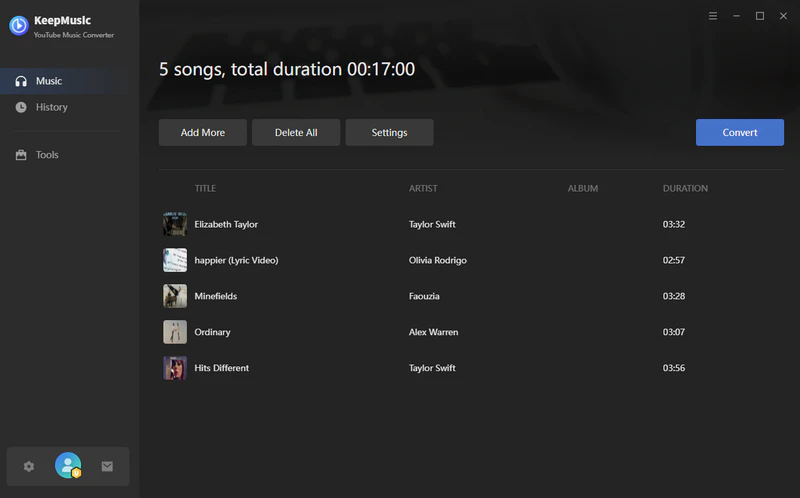
Click Convert to start exporting the YouTube Music playlist as MP3 files to the specified output folder.
Step 5 Find YouTube Music Playlist in MP3 Format.
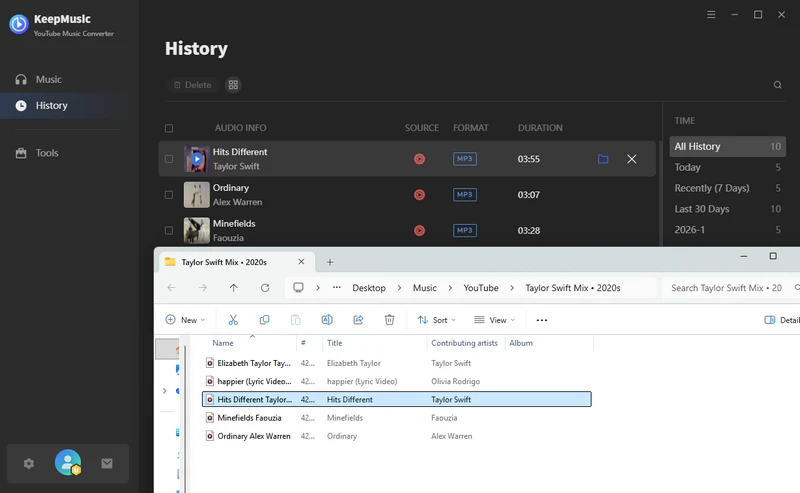
Usually, the output folder would pop up automatically once the conversion is done. If not, click the History in the left part and you’ll see all the YouTube Music that has been converted successfully. By clicking the Folder icon of each song, you’ll be directed to the local drive that saved the MP3 files.
Conclusion:
No matter what device you use, the process of canceling your YouTube Music subscription is simple. Just follow the steps above and you can easily end your subscription. If you want to download YouTube Music without a premium, you can choose KeepMusic YouTube Music Converter to help you.


